


0 of 0
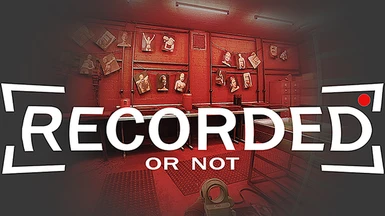


About this mod
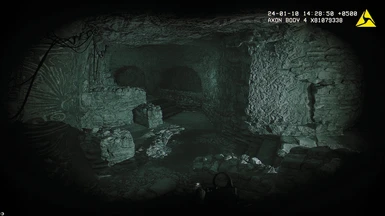
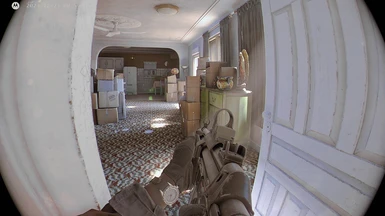
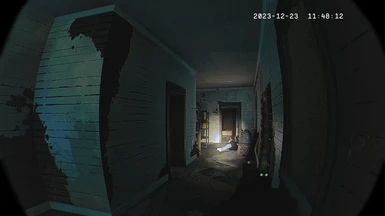
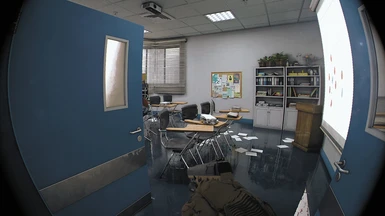
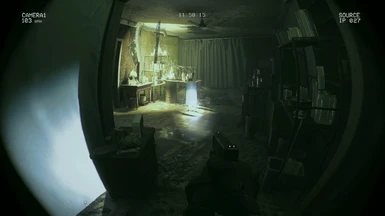
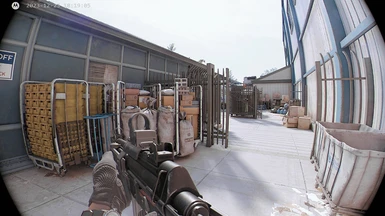
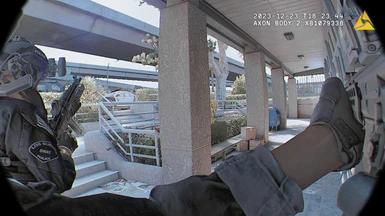
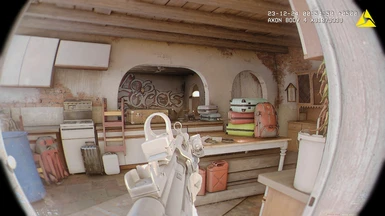
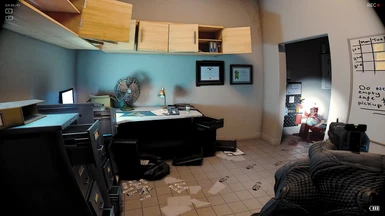
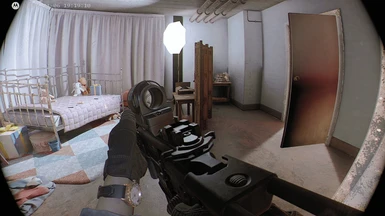
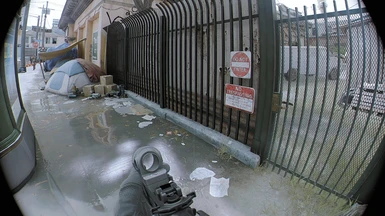
Photoreal reproduction of recording devices and bodycams based on real life datas emulated with custom shaders.
- Requirements
- Permissions and credits
- Changelogs
- Donations

v2.2b
All-in-one ReShade collection of 8 presets optimized for gameplay,
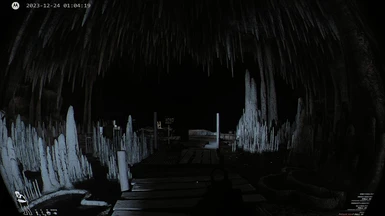
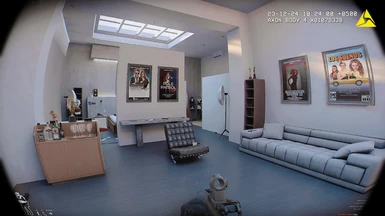
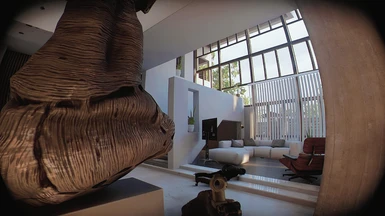
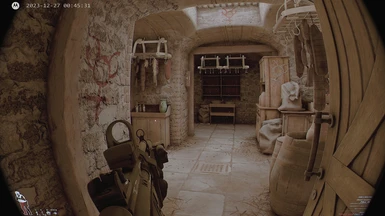
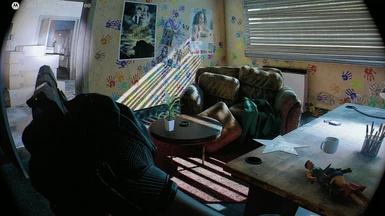
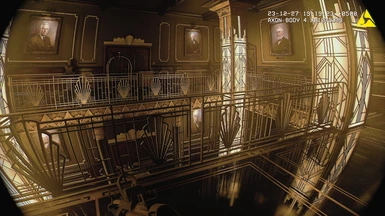
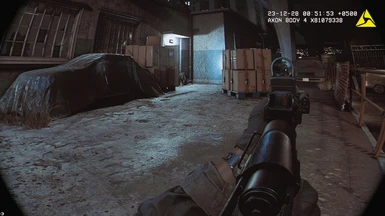
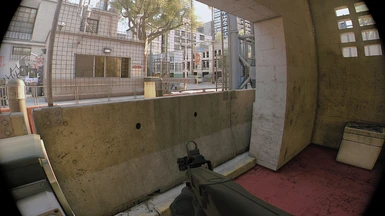
RECORDED or NOT emulates in details several body cameras types using their real life datas and properties injected within custom shaders.
The mod also enhances the lighting and base renderer of the game to ensure the life-like behaviour of the camera shaders and maxing out the photorealism.
:F E A T U R I N G:
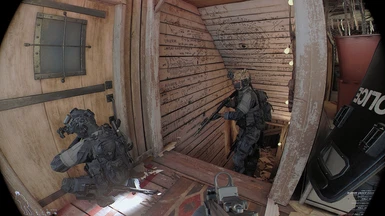
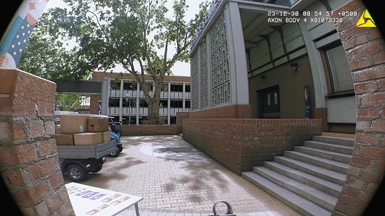
- Faithfull Recreation of Axon & Motorola bodycams, Unrecord, VHS camcorder, GoPro and more
- True emulation of recording pipeline from camera replication to recording codecs and resolutions
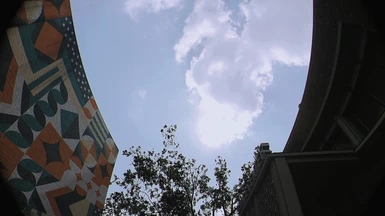
- Natural lighting and colors
- Real time camera watermarks/stamps
- Lens and body motion(screen shake)
- Enhanced game's renderer with better performances
- Readable user game interface and menus
-Easy and intuitive toggle of options and features
-Optimized for gameplay

[ I N S T A L L A T I O N ]
:: FIRST UNINSTALL ANY RESHADE FILES AND FOLDERS YOU MAY ALREADY HAVE ::
This is a 2 steps install :
1: Download & Extract the content inside the 01 RECORDEDorNOT 2.2b folder into
your steam game location : "Ready or Not\ReadyOrNot\Binaries\Win64".
2: Then install the *engine renderer modifications .PAK file inside 02 RENDER SETTINGS like any other mod :
DRY : All my edits* + No FOG and No Bloom, this is my personal favourite as it offers the most photoreal look combined with Recorded or Not.
WET : All my edits* WITH fog and my edited Bloom setting, this is a more cinematic/Gamey/atmospheric look which I know some people prefers
Just move the .pak file you selected into your ReadyOrNot\Content\Paks folder.
This render settings* offers better visuals combined with Recorded or Not and also offer much better performances.
They are redundant and not compatible with other render modifications such as Enhanced Ready or Not Visuals.
[ *Engine Modifications ]
* Removed vignette, grain, chromatic aberration and sharpening
* Changed ambiant occlusion settings to be more precise and to act like contact shadows
* Changed bloom settings to be softer
* Modified screen space reflections to be sharper
* Changed tonemapping to have a little more room in the middle tons for my reshade
* Change lod bias and anisotropy settings for textures to be crisper
: If you need some FPS back :
you can safely lower the post processing option of the game to medium or even low without any important quality loss,
as well as toggle off the Depth of Field as explained in the configuration below.
[ C O N F I G U R A T I O N ]
:S H O R T C U T S:
- "END" : open and close the ReShade interface.
- "SCROLL LOCK" : toggle the whole preset on/off
- "PRINTSCREEN" : take a .png screenshot that is created in the "Ready or Not\ReadyOrNot\Binaries\Win64" folder

Each preset comes with optional dedicated set of camera stamps/overlays that can be toggled ingame anytime:
- "Page Up" : toggle the full stamps informations
- "Page Down" : toggle only minor stamps informations
- "HOME" : toggle the depth of field (performance boost when off)
- "DELETE" : toggle the lens and camera motion / screen shake
- "INSERT" : toggle Night Mode Settings for night time maps or in dark areas
(such as Twisted Nerve, Port Hokan, Rust Belt tunnels, Caesar's Car Dealership and I also like to use it for Cherryesa Farm as well)
*NEW IN 2.1*
Select your keyboard type, QWERTY or AZERTY, to control the screen shake while moving.
If you are a QWERTY player or if you don't use the screenshake, you don't have anything to do.
If you are a AZERTY player then:
Simply open the ReShade interface with END key and select from the "keyboard" drop down your keyboard type.
Click the little floppy disk icon in the top right corner of the interface to save the change.
This needs to be done once for each preset.

Additional informations about configuration for personal preferences can be found in the F.A.Q in the comments section
[ P R E S E T S ]
::The presets are hierarchised from the lowest image quality to the highest::
Press "END" key to open the ReShade interface and select a preset from the upper left dropdown,
either using the arrows or clicking the dropdown box and then double clicking a preset to load it:

Press End key again to close the interface.
If a menu is too unreadable to use press "SCROLL LOCK" to temporary toggle on/off all the shaders.
Presets are swappable ingame any time according to your mood and preferences.
:V I D E O S:
All of the videos below are showcasing each presets using the DRY render settings .Pak
1440p no dlss, every graphic options maxed out
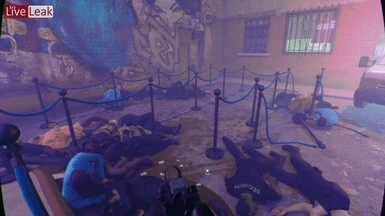
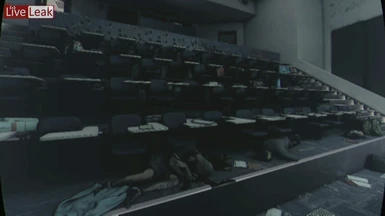
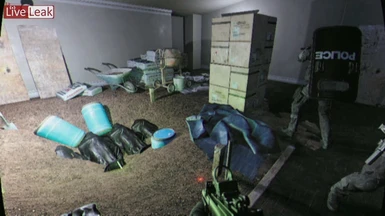
01 - Live Leak
txt
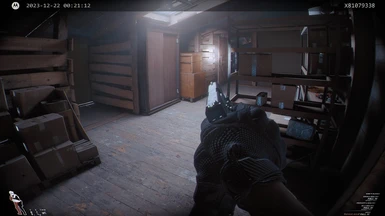
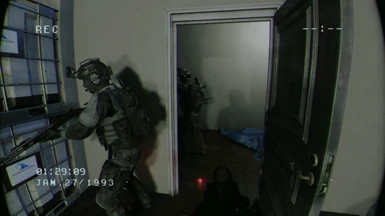
02 - Helmet Cam
txt
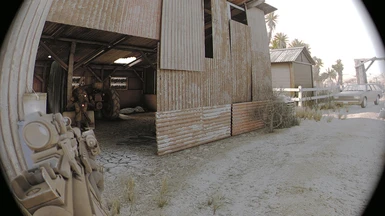
03 - VHS Camcorder
txt
04 - Axon Body 2
txt
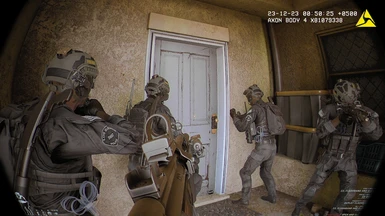
05 - Axon Body 4
txt
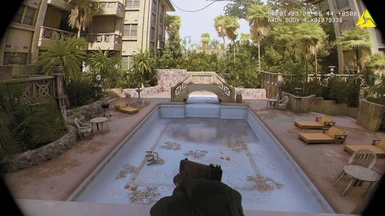
06 - Unrecord or Not
txt
07 - Motorola Bodycam
txt
08 - GoPro
txt
More informations about personal customization in the comment section
videos made using Recorded or Not v1.0 before Ready or Not 1.0 release
That's it, Enjoy !

If you enjoy my work as modder and everything I have brought to all the games I have modded so far,
please consider checking out my Ko-Fi to help me so I can continue my work and make new content:

v2.2b
All-in-one ReShade collection of 8 presets optimized for gameplay,
RECORDED or NOT emulates in details several body cameras types using their real life datas and properties injected within custom shaders.
The mod also enhances the lighting and base renderer of the game to ensure the life-like behaviour of the camera shaders and maxing out the photorealism.
:F E A T U R I N G:
- Faithfull Recreation of Axon & Motorola bodycams, Unrecord, VHS camcorder, GoPro and more
- True emulation of recording pipeline from camera replication to recording codecs and resolutions
- Natural lighting and colors
- Real time camera watermarks/stamps
- Lens and body motion(screen shake)
- Enhanced game's renderer with better performances
- Readable user game interface and menus
-Easy and intuitive toggle of options and features
-Optimized for gameplay
[ I N S T A L L A T I O N ]
:: FIRST UNINSTALL ANY RESHADE FILES AND FOLDERS YOU MAY ALREADY HAVE ::
This is a 2 steps install :
1: Download & Extract the content inside the 01 RECORDEDorNOT 2.2b folder into
your steam game location : "Ready or Not\ReadyOrNot\Binaries\Win64".
2: Then install the *engine renderer modifications .PAK file inside 02 RENDER SETTINGS like any other mod :
DRY : All my edits* + No FOG and No Bloom, this is my personal favourite as it offers the most photoreal look combined with Recorded or Not.
WET : All my edits* WITH fog and my edited Bloom setting, this is a more cinematic/Gamey/atmospheric look which I know some people prefers
Just move the .pak file you selected into your ReadyOrNot\Content\Paks folder.
This render settings* offers better visuals combined with Recorded or Not and also offer much better performances.
They are redundant and not compatible with other render modifications such as Enhanced Ready or Not Visuals.
[ *Engine Modifications ]
* Removed vignette, grain, chromatic aberration and sharpening
* Changed ambiant occlusion settings to be more precise and to act like contact shadows
* Changed bloom settings to be softer
* Modified screen space reflections to be sharper
* Changed tonemapping to have a little more room in the middle tons for my reshade
* Change lod bias and anisotropy settings for textures to be crisper
: If you need some FPS back :
you can safely lower the post processing option of the game to medium or even low without any important quality loss,
as well as toggle off the Depth of Field as explained in the configuration below.
[ C O N F I G U R A T I O N ]
:S H O R T C U T S:
- "END" : open and close the ReShade interface.
- "SCROLL LOCK" : toggle the whole preset on/off
- "PRINTSCREEN" : take a .png screenshot that is created in the "Ready or Not\ReadyOrNot\Binaries\Win64" folder
Each preset comes with optional dedicated set of camera stamps/overlays that can be toggled ingame anytime:
- "Page Up" : toggle the full stamps informations
- "Page Down" : toggle only minor stamps informations
- "HOME" : toggle the depth of field (performance boost when off)
- "DELETE" : toggle the lens and camera motion / screen shake
- "INSERT" : toggle Night Mode Settings for night time maps or in dark areas
(such as Twisted Nerve, Port Hokan, Rust Belt tunnels, Caesar's Car Dealership and I also like to use it for Cherryesa Farm as well)
*NEW IN 2.1*
Select your keyboard type, QWERTY or AZERTY, to control the screen shake while moving.
If you are a QWERTY player or if you don't use the screenshake, you don't have anything to do.
If you are a AZERTY player then:
Simply open the ReShade interface with END key and select from the "keyboard" drop down your keyboard type.
Click the little floppy disk icon in the top right corner of the interface to save the change.
This needs to be done once for each preset.
Additional informations about configuration for personal preferences can be found in the F.A.Q in the comments section
[ P R E S E T S ]
::The presets are hierarchised from the lowest image quality to the highest::
Press "END" key to open the ReShade interface and select a preset from the upper left dropdown,
either using the arrows or clicking the dropdown box and then double clicking a preset to load it:
Press End key again to close the interface.
If a menu is too unreadable to use press "SCROLL LOCK" to temporary toggle on/off all the shaders.
Presets are swappable ingame any time according to your mood and preferences.
:V I D E O S:
All of the videos below are showcasing each presets using the DRY render settings .Pak
1440p no dlss, every graphic options maxed out
01 - Live Leak
txt
02 - Helmet Cam
txt
03 - VHS Camcorder
txt
04 - Axon Body 2
txt
05 - Axon Body 4
txt
06 - Unrecord or Not
txt
07 - Motorola Bodycam
txt
08 - GoPro
txt
More informations about personal customization in the comment section
videos made using Recorded or Not v1.0 before Ready or Not 1.0 release
That's it, Enjoy !
If you enjoy my work as modder and everything I have brought to all the games I have modded so far,
please consider checking out my Ko-Fi to help me so I can continue my work and make new content: